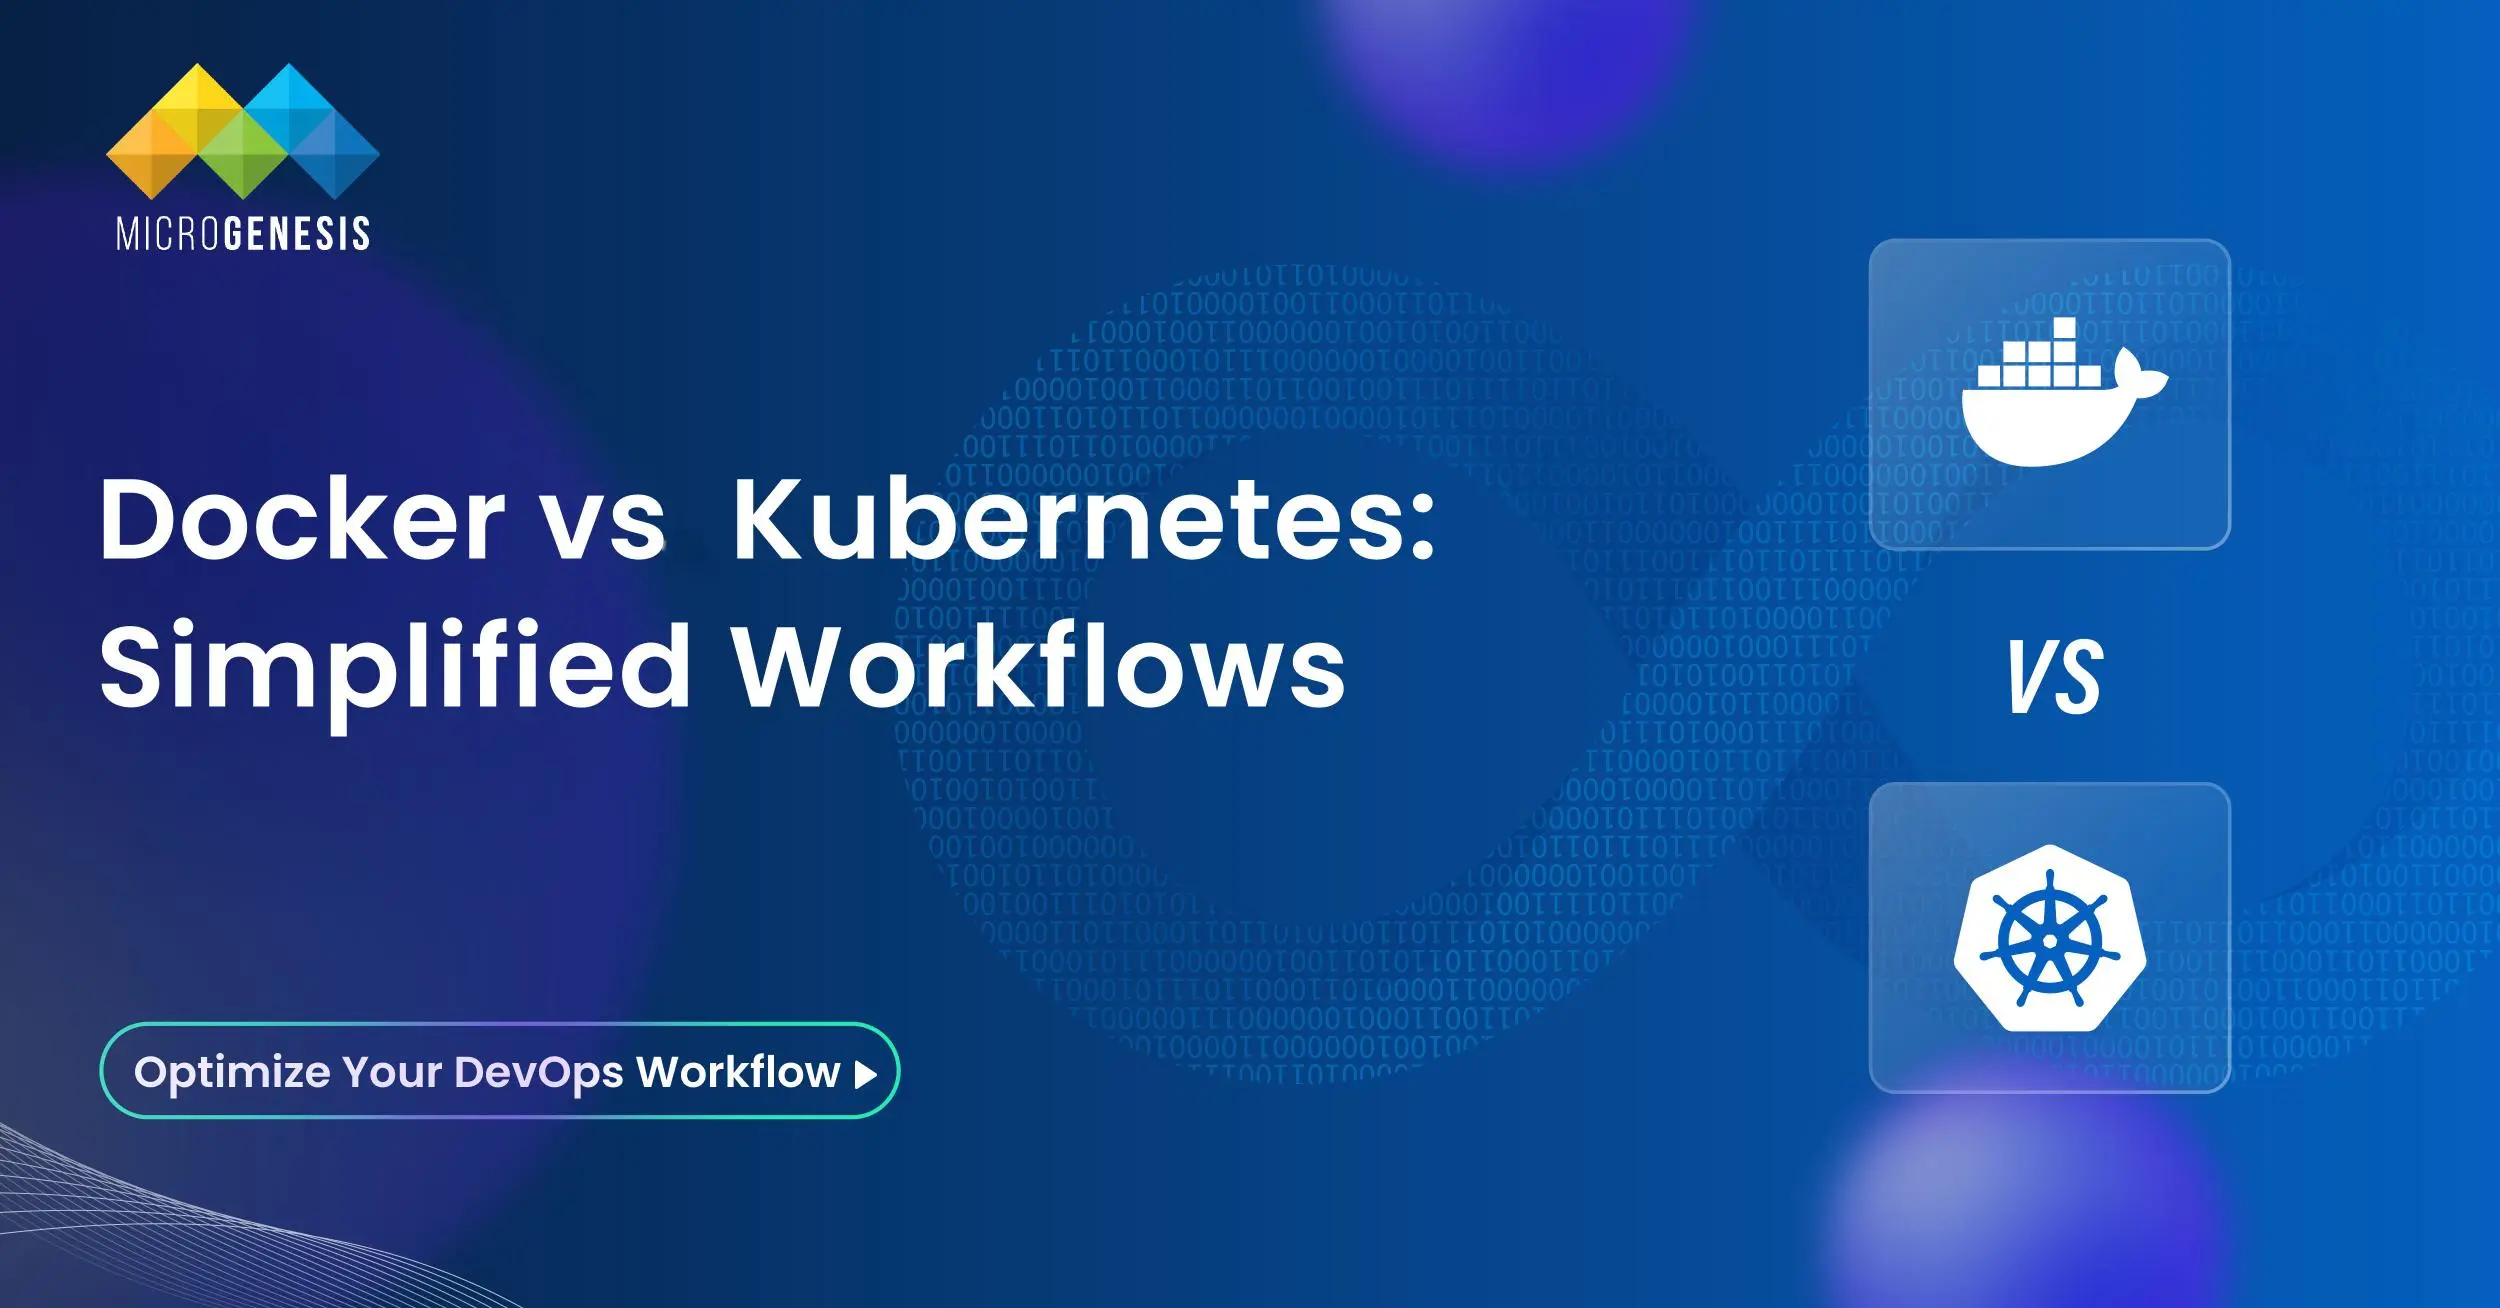
The world of software development has evolved significantly over the past decade, and two technologies that have played a pivotal role in this evolution are Docker and Kubernetes. These tools have revolutionized how applications are developed, deployed, and managed, making containerization and orchestration fundamental to modern DevOps practices.
In this blog, we will explore the concepts of containerization and orchestration, delve into the key differences between Docker and Kubernetes, and discuss how these technologies complement each other to streamline application delivery and management.
What is Containerization?
Containerization is a lightweight form of virtualization that packages an application and its dependencies into a single unit called a container. These containers can run on any environment, ensuring consistent application behavior across platforms. Partner with a leading DevOps services company like MicroGenesis to harness the power of containerization for seamless development and deployment.
Benefits of Containerization
Portability: Containers can run on any system with a container runtime, ensuring consistency between development, testing, and production environments.
Resource Efficiency: Containers share the host operating system kernel, making them more lightweight and efficient compared to traditional virtual machines.
Scalability: Containers can be easily scaled up or down based on demand.
Isolation: Each container runs in its own isolated environment, reducing the risk of conflicts between applications.
Key Containerization Tools
Docker
Podman
LXC (Linux Containers)
Among these, Docker has become the de facto standard for containerization.
What is Docker?
Docker is an open-source platform that enables developers to automate the deployment of applications inside containers. It simplifies building, sharing, and running containerized applications. Leverage DevOps consulting services from MicroGenesis to maximize Docker’s potential and streamline your application lifecycle management.
Key Features of Docker
Docker Engine: The core component that creates and runs containers.
Docker Hub: A cloud-based registry for sharing container images.
Docker Compose: A tool for defining and running multi-container applications.
Docker Swarm: Docker’s native orchestration tool.
How Docker Works
Dockerfile: Developers create a Dockerfile that contains instructions to build a container image.
Docker Image: The Dockerfile is used to build a Docker image, which is a lightweight, standalone package of software.
Docker Container: The image is deployed as a container, which is a running instance of the image.
Advantages of Docker
Simplifies application packaging and deployment.
Ensures consistency across development, testing, and production environments.
Speeds up the software delivery process.
What is Orchestration?
Orchestration refers to the automated management of containerized applications across multiple hosts. It involves scheduling, deploying, scaling, and managing the lifecycle of containers to ensure high availability and performance.
Key Orchestration Tools
Kubernetes
Docker Swarm
Apache Mesos
Nomad (HashiCorp)
Among these tools, Kubernetes has emerged as the leading orchestration platform.
What is Kubernetes?
Kubernetes, often abbreviated as K8s, is an open-source container orchestration platform developed by Google. It automates the deployment, scaling, and management of containerized applications.
Key Features of Kubernetes
Automated Scheduling: Kubernetes automatically schedules containers based on resource availability and requirements.
Self-Healing: Kubernetes can automatically restart failed containers and replace them if needed.
Scaling: Kubernetes supports both horizontal and vertical scaling of containers.
Load Balancing: Kubernetes distributes traffic across multiple containers to ensure high availability.
Rolling Updates and Rollbacks: Kubernetes allows seamless updates to applications without downtime.
How Kubernetes Works
Master Node: The control plane that manages the Kubernetes cluster.
Worker Nodes: The nodes where containers are deployed.
Pods: The smallest deployable unit in Kubernetes, containing one or more containers.
Services: A way to expose applications running in pods to the outside world.
Controllers: Manage the state of the cluster, including deployments and replicas.
Docker vs. Kubernetes: Key Differences
While Docker and Kubernetes are often mentioned together, they serve different purposes. Docker is primarily a containerization platform, while Kubernetes is an orchestration platform.
Feature
Docker
Kubernetes
Purpose
Containerization
Orchestration
Ease of Use
Simple to set up and use
More complex to set up and manage
Scalability
Limited built-in scalability
Highly scalable
Self-Healing
Basic (requires manual intervention)
Automated self-healing capabilities
Load Balancing
Basic
Advanced load balancing across pods
Community Support
Large and active community
Large and active community
Deployment Type
Suitable for single-host deployments
Suitable for multi-host, large-scale deployments
How Docker and Kubernetes Work Together
While Docker and Kubernetes can be used independently, they are often used together to provide a complete solution for containerization and orchestration.
Workflow Example
Developers create a Dockerfile to define the application and its dependencies.
Docker builds an image from the Dockerfile.
The Docker image is pushed to a container registry like Docker Hub.
Kubernetes pulls the Docker image from the registry and deploys it as a pod.
Kubernetes manages the lifecycle of the pod, ensuring high availability and scaling as needed.
Use Cases of Docker and Kubernetes
Docker Use Cases
Microservices Architecture: Docker simplifies the deployment of microservices by packaging each service in its own container.
Development and Testing: Docker ensures that developers have a consistent environment, reducing the “works on my machine” problem.
CI/CD Pipelines: Docker is widely used in continuous integration and continuous deployment workflows.
Kubernetes Use Cases
Large-Scale Applications: Kubernetes is ideal for managing large-scale, distributed applications.
Hybrid and Multi-Cloud Deployments: Kubernetes supports hybrid cloud and multi-cloud environments, making it suitable for enterprises with complex infrastructure needs.
High Availability Applications: Kubernetes ensures that applications remain available even in the event of node failures.
Security: Containers share the host OS kernel, which can introduce security risks if not properly managed.
Networking: Docker networking can be complex in multi-host environments.
Kubernetes Challenges
Complexity: Kubernetes has a steep learning curve and requires significant expertise to manage.
Resource Intensive: Kubernetes can be resource-intensive, requiring robust infrastructure.
Conclusion
Containerization and orchestration are essential components of modern DevOps practices. Docker simplifies packaging and deployment, while Kubernetes automates the management of containerized applications at scale.
MicroGenesis, a trusted DevOps services provider and IT solution company, helps organizations harness the power of Docker and Kubernetes to build robust, scalable, and efficient cloud-native applications. Our expertise ensures seamless integration of these technologies into your workflows, empowering faster development cycles, optimal resource utilization, and improved application reliability.
Partner with MicroGenesis to streamline your DevOps processes and unlock the full potential of Docker and Kubernetes.
In today’s fast-paced business world, effective project management is crucial for all types of teams – not just for developers and tech specialists. However, many non-technical teams shy away from project management tools like Jira, thinking it’s too complicated or geared solely towards software development. The truth is, Jira can be a powerful tool for marketing, HR, finance, and other non-tech teams if utilized correctly.
In this comprehensive guide, we will explore how non-tech teams can leverage Jira to streamline their workflows, improve collaboration, and manage projects efficiently without needing to dive deep into technical jargon. With expert Jira services, you’ll discover how to set up Jira for your team, customize it to fit your needs, and overcome common challenges seamlessly.
Why Non-Tech Teams Should Use Jira
Jira is often associated with software development, but it’s a highly versatile tool that can be customized to fit the needs of any team. Here are some key benefits for non-tech teams:
Improved Project Visibility: Jira provides a clear view of tasks, deadlines, and project progress.
Better Collaboration: Teams can easily communicate and track updates in one central location.
Customizable Workflows: Jira workflows can be tailored to fit any team’s processes, from marketing campaigns to recruitment pipelines.
Powerful Reporting: Built-in reporting tools help track performance and identify bottlenecks.
Scalable Solution: Jira can grow with your team, supporting everything from small projects to enterprise-level initiatives.
Common Misconceptions About Jira for Non-Tech Teams
Before diving into the details, it’s essential to address some common misconceptions that non-tech teams may have about Jira. With the right guidance and customization through Jira consulting services, teams can unlock its full potential, transforming it into a user-friendly and powerful tool for project management.
Misconception: Jira is Only for Developers
Truth: Jira offers templates and features suitable for any business team, including marketing, HR, finance, and operations.
Misconception: Jira is Too Complex
Truth: Jira can be as simple or as complex as you make it. Start with basic workflows and add complexity as needed.
Misconception: Non-Tech Teams Won’t Benefit from Jira
Truth: Any team that manages tasks and projects can benefit from Jira’s tracking and reporting capabilities.
Getting Started with Jira for Non-Tech Teams
1. Setting Up Your Jira Project
To start managing projects in Jira, follow these simple steps:
Step 1: Create a New Project
Log in to your Jira account.
Click on Projects and then Create Project.
Choose a project template that best fits your team’s needs. For non-tech teams, the Business Project template is a good starting point.
Step 2: Customize Your Project Settings
Set the project name and key.
Adjust project permissions to ensure the right people have access.
Step 3: Define Your Workflow
Identify the stages your tasks typically go through (e.g., To Do, In Progress, Done).
Customize the workflow to match your team’s processes. For example:
Marketing Teams: Draft → Review → Approved → Published
HR Teams: Application Received → Interviewing → Offer Made → Hired
2. Creating and Managing Issues
In Jira, tasks are called issues. Non-tech teams can use issues to track various types of work, such as:
Marketing: Blog posts, social media campaigns, event planning
Operations: Process improvements, vendor management
How to Create an Issue
Go to your project.
Click on Create.
Fill in the issue details, such as summary, description, and due date.
How to Assign and Prioritize Issues
Assign issues to team members.
Set priority levels (e.g., High, Medium, Low) to indicate urgency.
Use Labels and Components
Labels: Add labels to categorize issues (e.g., Blog, Social Media, Finance Report).
Components: Use components to group related tasks within a project.
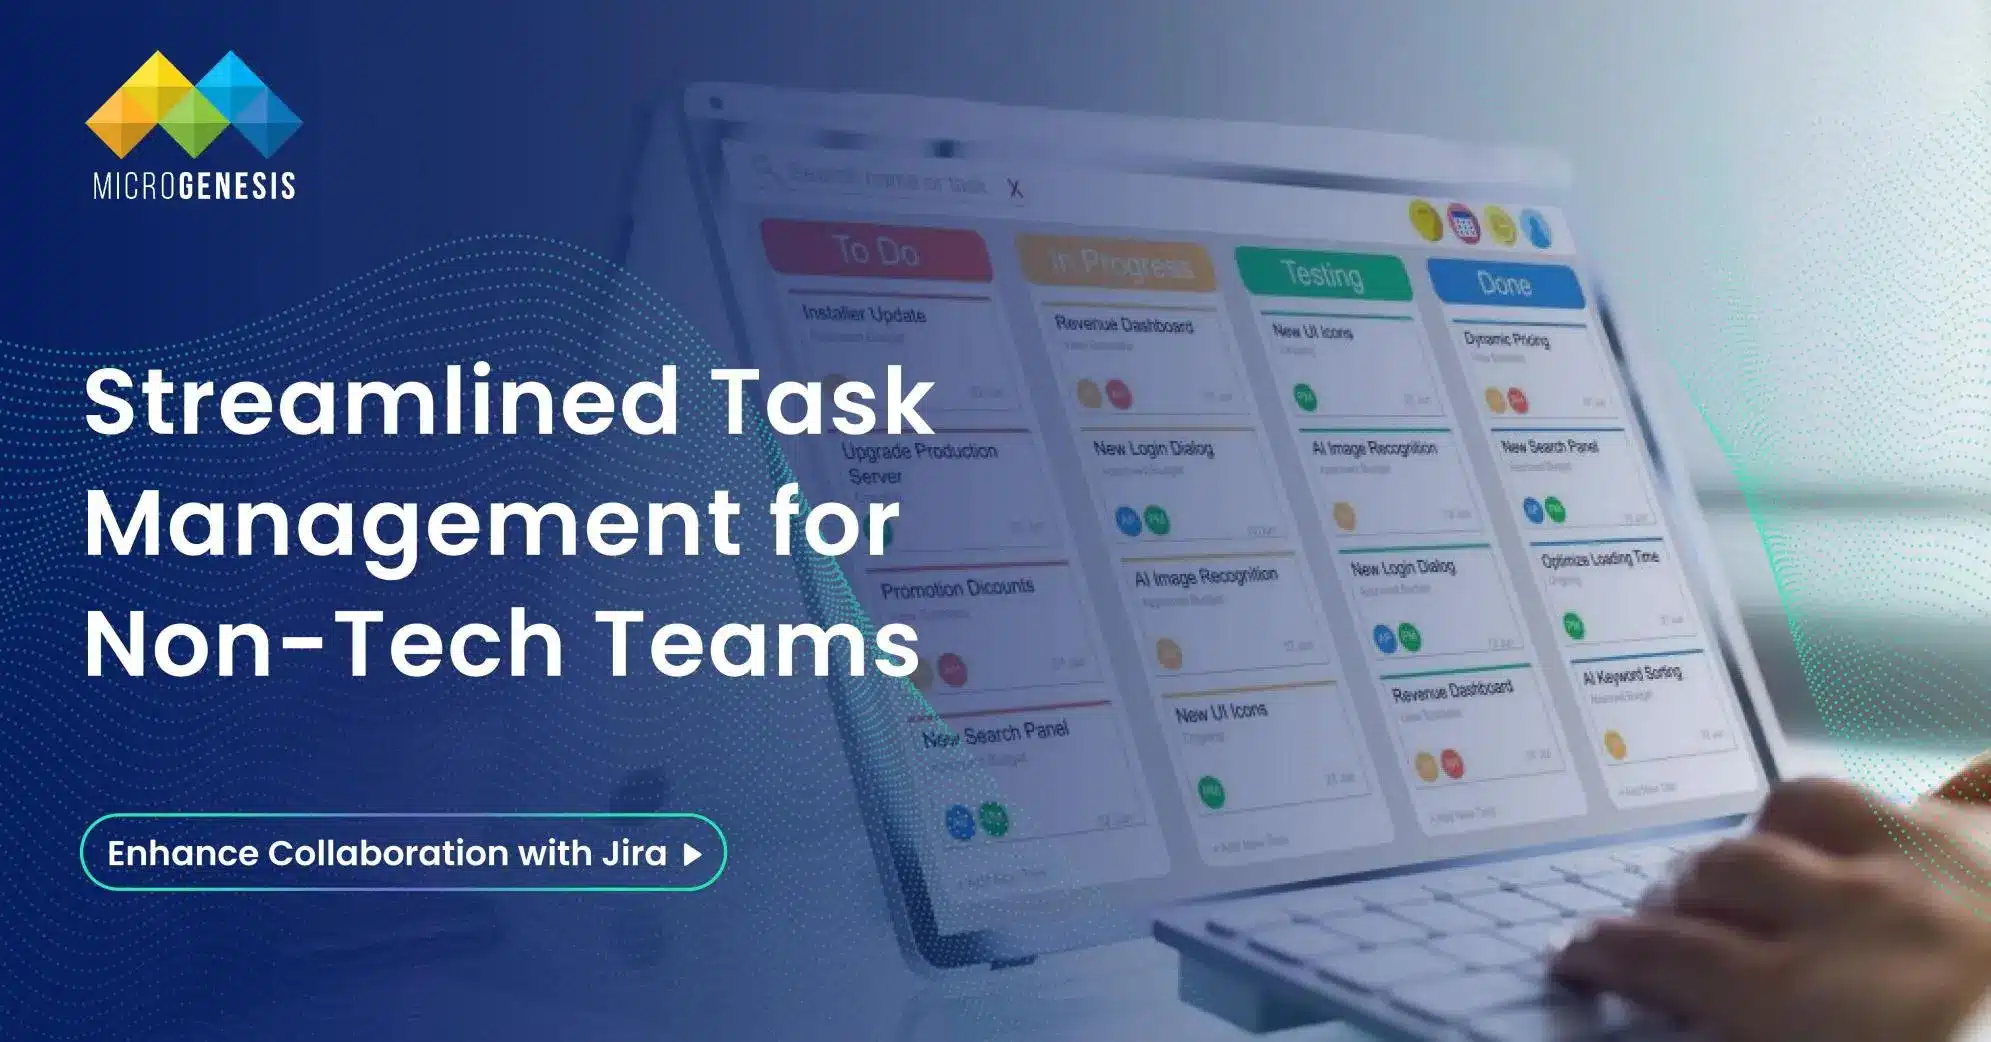
Using Jira Boards to Visualize Work
Jira boards provide a visual representation of your project. For non-tech teams, the Kanban board is a great choice, as it’s simple and focuses on continuous workflow.
How to Set Up a Kanban Board
Go to your project and click on Board.
Choose Create Board and select Kanban.
Customize the columns to reflect your workflow stages (e.g., To Do, In Progress, Done).
Drag and Drop: Move tasks between columns to update their status.
Visual Progress: See the overall progress of your project at a glance.
Identify Bottlenecks: Quickly spot where tasks are getting stuck.
Practical Use Cases for Non-Tech Teams
1. Marketing Teams
Marketing teams can use Jira to manage campaigns, content creation, and events.
Example Workflow:
To Do → In Progress → Review → Published
Types of Issues:
Blog posts
Social media content
Email campaigns
Event planning
2. HR Teams
HR teams can manage recruitment, onboarding, and policy updates in Jira.
Example Workflow:
Application Received → Interviewing → Offer Made → Hired
Types of Issues:
Job postings
Employee onboarding tasks
Policy document updates
3. Finance Teams
Finance teams can track budgets, invoices, and financial reports.
Example Workflow:
To Do → In Review → Approved → Paid
Types of Issues:
Invoice approvals
Budget tracking
Financial audits
Tips for Non-Tech Teams to Succeed with Jira
Start Simple: Don’t overcomplicate your Jira setup. Start with basic workflows and adjust as needed.
Use Automation: Automate repetitive tasks to save time. For example, automatically assign tasks to specific team members when a new issue is created.
Leverage Templates: Use templates for recurring tasks to save time and ensure consistency.
Train Your Team: Make sure everyone on your team understands how to use Jira. Conduct training sessions if necessary.
Regularly Review Your Board: Hold regular meetings to review the board, update statuses, and discuss any blockers.
Common Challenges and How to Overcome Them
Challenge 1: Resistance to Change
Solution: Highlight the benefits of using Jira and provide proper training.
Challenge 2: Overcomplicating the Setup
Solution: Start with simple workflows and gradually add complexity as needed.
Challenge 3: Keeping Jira Updated
Solution: Set reminders and encourage team members to update Jira regularly.
Advanced Features for Non-Tech Teams
Automation Rules: Create rules to automate repetitive tasks, such as transitioning issues when statuses change.
Custom Fields: Add custom fields to capture specific information relevant to your team’s projects.
Jira Integrations: Integrate Jira with other tools like Slack, Confluence, and Google Workspace for seamless collaboration.
Reports and Dashboards: Use Jira’s reporting features to track project performance and identify areas for improvement.
Conclusion
Jira is a powerful project management tool that can benefit non-tech teams when used effectively. By customizing workflows, creating clear boards, and leveraging Jira’s features, teams like marketing, HR, and finance can streamline processes and enhance collaboration. As a trusted Jira Service Desk Consultant and Best IT Company, MicroGenesis helps non-technical teams unlock Jira’s full potential. Don’t let its reputation as a “developer tool” hold you back—MicroGenesis ensures a smooth and impactful adoption of Jira for any team.
Start simple, stay consistent, and elevate your team’s productivity with MicroGenesis and Jira!
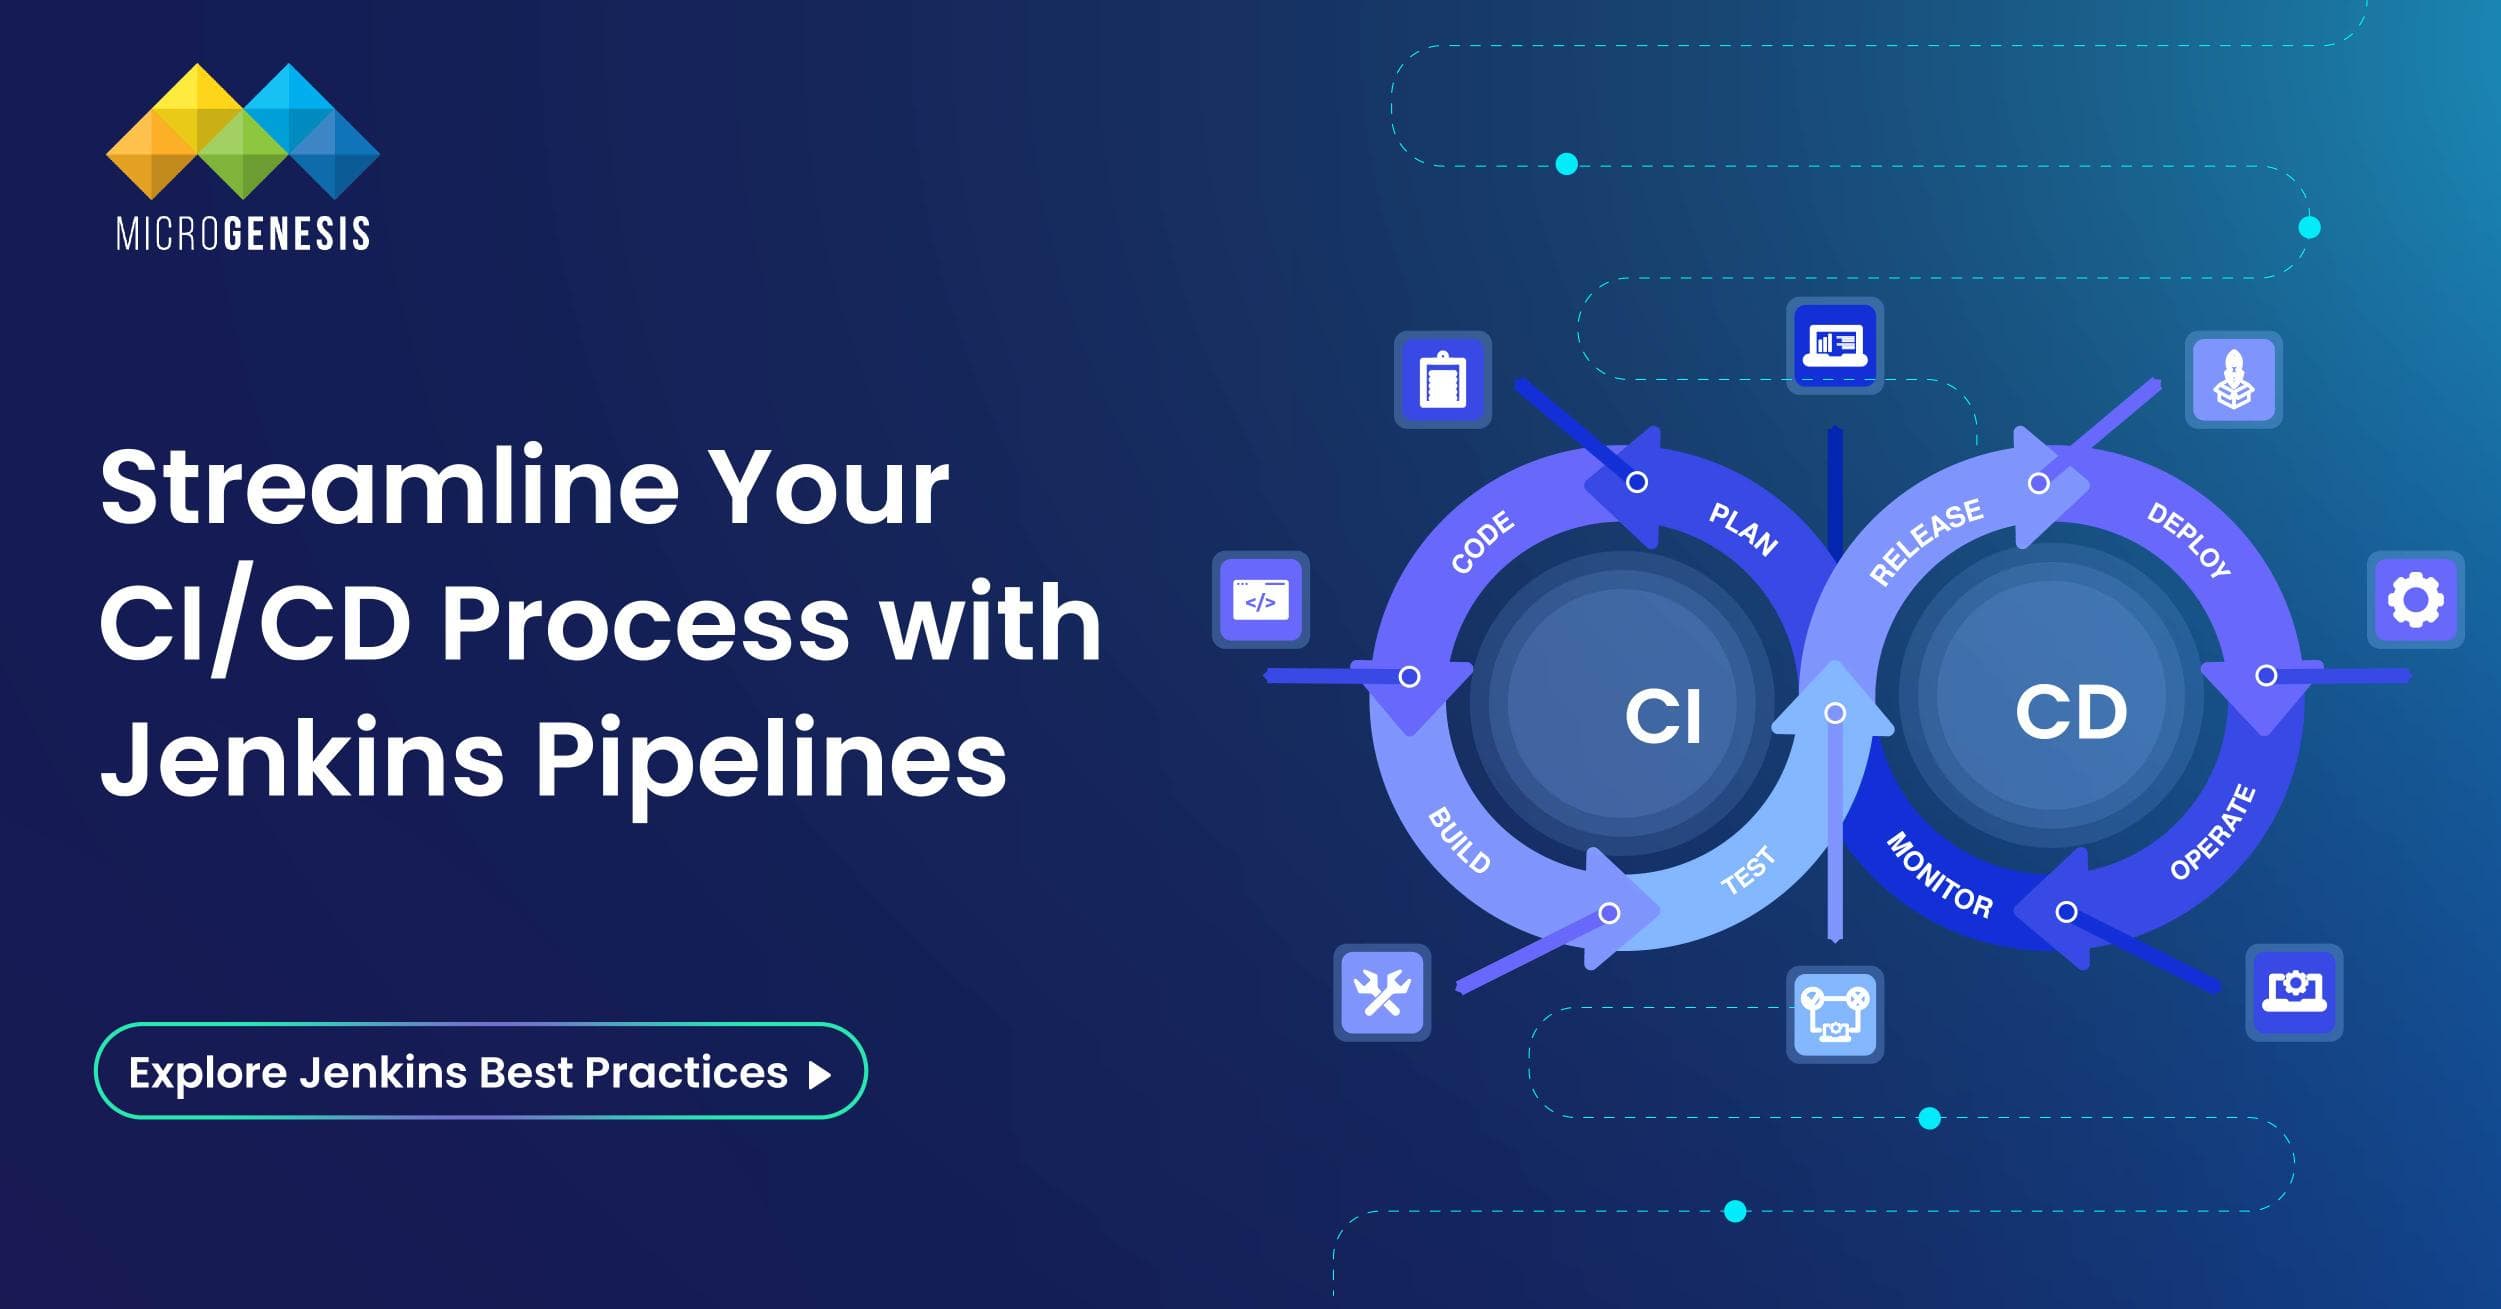
Jenkins Pipelines represent the backbone of modern software delivery, enabling developers to automate and streamline complex workflows efficiently. Whether you’re a seasoned DevOps engineer or a beginner exploring CI/CD concepts, mastering Jenkins Pipelines is pivotal for ensuring seamless software development, testing, and deployment.
What is a Jenkins Pipeline?
A Jenkins Pipeline is a robust set of automation tools within Jenkins, designed to support continuous integration and continuous delivery (CI/CD). It is a suite of plugins that enable defining and automating the build, test, and deployment phases of a software development process as code, known as Pipeline as Code.
This concept simplifies managing workflows and provides visibility, scalability, and resilience to the software delivery process, ensuring a streamlined approach to developing and deploying applications. Here’s a detailed exploration:
Key Features of Jenkins Pipeline (Expanded)
Pipeline as Code
Jenkins pipelines use Groovy scripting to define workflows in text files like Jenkinsfile. This enables teams to version control their CI/CD processes alongside the application code. As workflows are stored as code, they are easy to review, share, and replicate, fostering consistency and collaboration.
Extensibility
Jenkins seamlessly integrates with numerous plugins, tools, and external services, such as Git for source control, Docker for containerized builds, and Kubernetes for orchestration. These integrations provide flexibility and adaptability to suit diverse project requirements and infrastructure needs.
Scalability
With its ability to run jobs across distributed environments, Jenkins Pipelines can manage workloads for projects of varying sizes. It leverages master-agent architecture, allowing parallel task execution and efficient resource utilization, making it ideal for enterprise-level CI/CD systems.
Visualization
Jenkins offers robust dashboards to monitor pipeline execution and performance metrics. These visual tools display detailed logs, job statuses, and build histories, enabling teams to quickly identify and address bottlenecks or failures in the pipeline.
Types of Jenkins Pipelines (Expanded)
Declarative Pipeline
Declarative pipelines are designed with a high-level, user-friendly syntax that emphasizes simplicity and readability. They are ideal for structured workflows and for users who are new to Jenkins. These pipelines are defined using a pipeline block, encapsulating all configuration details within structured stages. The syntax reduces complexity by providing built-in validation and error checking, which helps avoid mistakes in pipeline configuration. The declarative approach enforces a standardized format, making it easier for teams to adopt best practices and maintain consistency across workflows.
Key Features of Declarative Pipelines:
Intuitive and structured syntax.
Simplifies defining stages, steps, and post-build actions.
Facilitates better error handling with predefined blocks like post, agent, and environment.
Scripted Pipeline
Scripted pipelines use the Groovy-based Domain-Specific Language (DSL) of Jenkins, offering advanced customization and dynamic functionality. They are well-suited for users with programming expertise who require flexible, programmatic control over pipeline behavior. Unlike declarative pipelines, scripted pipelines follow a free-form syntax, where workflows are defined using the node block. This allows users to incorporate loops, conditional logic, and external libraries, catering to complex CI/CD workflows.
Key Features of Scripted Pipelines:
Highly flexible, suitable for intricate workflows.
Supports advanced programming constructs like loops, conditionals, and external libraries.
Ideal for projects requiring dynamic configurations or reusable pipeline logic.
Choosing Between Declarative and Scripted Pipelines
Selecting between declarative and scripted pipelines hinges on your project’s complexity and your team’s skill set:
Declarative Pipelines: Ideal for simpler workflows with a structured format, making them suitable for teams seeking standardization or onboarding new members. They streamline configuration with intuitive syntax and built-in validations.
Scripted Pipelines: Best for advanced users tackling dynamic or complex requirements. Their flexibility allows for intricate logic, reusable code, and tailored solutions, making them suitable for experienced developers managing sophisticated CI/CD processes.
Stages in a Jenkins Pipeline
1. Build Stage
The build stage focuses on compiling source code, managing dependencies, and preparing the application for further processes. This stage ensures that the codebase is correctly compiled and can involve tools like Maven, Gradle, or other build automation systems.
2. Test Stage
Testing is crucial to maintain software quality. In this stage:
Unit tests verify individual components.
Integration tests ensure that modules work together.
Performance and regression tests identify issues under various conditions.
3. Integration Stage
The integration stage validates that the combined code from multiple developers works cohesively. It resolves any conflicts, detects build issues, and confirms compatibility across various environments or platforms. As a DevOps service provider, we ensure seamless integration with expert tools and practices for efficient collaboration and error-free builds.
4. Deploy Stage
This stage automates the process of deploying the application to production, staging, or testing environments. It can include configurations for containers (e.g., Docker), virtual machines, or cloud platforms (AWS, Azure, GCP). Deployment pipelines often include rollback strategies and monitoring to ensure reliability.
Benefits of Jenkins Pipelines
1. Automation: Jenkins pipelines automate various repetitive tasks, such as building, testing, and deploying code, which helps to speed up the entire software development process. By automating these steps, developers can reduce manual intervention, ensuring a faster delivery pipeline while minimizing human errors.
2. Version Control Integration: Jenkins integrates directly with version control systems like Git, allowing teams to store pipelines as code. This integration ensures that the pipeline configurations are consistent, versioned, and auditable, enabling teams to track changes effectively and maintain codebase integrity.
3. Error Detection: Jenkins pipelines help detect errors early in the development cycle by running automated tests after each code change. Identifying and addressing issues at the earliest stages helps prevent delays in the later stages of the development process, ultimately leading to lower costs and better quality.
4. Team Collaboration: Jenkins provides a central platform where developers, testers, and operations teams can collaborate. With a unified view of the pipeline, all stakeholders can efficiently communicate, share progress, and ensure that the delivery pipeline is running smoothly. This promotes better teamwork, accountability, and continuous improvement across teams.
Use Declarative Pipelines for Simplicity: For simplicity and readability, especially for beginners or smaller teams, use declarative pipelines. This approach offers a more structured and readable syntax.
Modular Pipelines: Break down pipelines into smaller, reusable components. This improves maintainability and reduces duplication across multiple projects or stages.
Secure Secrets Management: Store sensitive information securely by using tools like the Jenkins Credentials Plugin. This helps to protect credentials and other sensitive data within your pipeline.
Scalable Nodes: Distribute builds across multiple nodes to handle larger projects or reduce bottlenecks, ensuring smoother performance and scalability.
Monitor and Optimize: Regularly monitor pipeline performance and make adjustments as needed. Use performance analytics and feedback to identify areas for optimization, reducing build times and improving efficiency.
Common Challenges and How to Overcome Them
Pipeline Maintenance Complexity:
Solution: Regularly review and refactor pipelines to ensure they remain easy to maintain. Use modular and reusable components to simplify ongoing updates and changes.
Resource Constraints:
Solution: Scale Jenkins infrastructure by adding more nodes and adjusting resource allocation to prevent bottlenecks during high-load builds.
Testing Failures:
Solution: Implement a robust testing strategy that includes unit, integration, and functional tests. Identify flaky tests and handle them with retry mechanisms to reduce false negatives.
Security Vulnerabilities:
Solution: Regularly audit pipeline configurations and use best practices for secret management. Apply security plugins to restrict access and minimize risks.
Advanced Features of Jenkins Pipeline
Parallel Execution: Jenkins pipelines can run multiple tasks simultaneously, speeding up the overall process. This is especially useful for testing and building various parts of an application concurrently.
Docker Integration: Jenkins pipelines can be integrated with Docker to create isolated containers for building, testing, and deploying applications, ensuring consistency across different environments.
Shared Libraries: You can define reusable steps or functions in a shared library, making your pipeline code more modular and maintainable across projects.
Pipeline Triggers: Pipelines can be triggered automatically based on certain events like code commits, pull requests, or scheduled intervals, enabling continuous integration and continuous delivery (CI/CD).
Matrix Builds: Jenkins allows you to execute a matrix of builds, enabling you to test multiple versions, environments, or configurations at once, which is particularly useful for testing cross-browser or cross-platform compatibility.
User-Defined Parameters: Pipelines can be customized by adding parameters that allow users to pass dynamic values during runtime, giving flexibility to build and deploy different versions or configurations.
Declarative and Scripted Pipeline Syntax: Advanced users can use the scripted pipeline syntax to provide more granular control over the build process, while declarative syntax simplifies the pipeline structure and is more user-friendly.
Conclusion
Jenkins Pipelines revolutionize the CI/CD process, offering developers an efficient, automated, and collaborative way to manage software delivery. By adopting pipelines, teams can ensure quality, scalability, and faster time-to-market for their applications. At MicroGenesis, a trusted digital transformation company, our DevOps consulting services empower businesses to harness the full potential of Jenkins Pipelines, delivering tailored solutions that align with your operational needs. Explore the world of Jenkins Pipelines with MicroGenesis to streamline your workflows, enhance collaboration, and stay ahead in the competitive software development landscape.
Digital transformation is essential for modern enterprises seeking to thrive in today’s competitive and rapidly evolving digital landscape. However, embarking on this journey without a clear roadmap and robust strategies can lead to setbacks and inefficiencies. To ensure success, organizations need a structured approach that aligns with their goals and fosters innovation.
This blog outlines a comprehensive roadmap and effective strategies for navigating the digital transformation journey, equipping enterprises with the tools and insights needed to excel.
The Roadmap to Digital Transformation
1. Define the Vision and Objectives
The first step is to establish a clear vision for your digital transformation efforts.
Identify the “Why”: Understand why digital transformation is necessary for your organization. Align these objectives with broader business goals such as increasing market share, enhancing customer satisfaction, or improving operational efficiency.
Set SMART Goals: Develop specific, measurable, achievable, relevant, and time-bound goals to guide the transformation.
2. Conduct a Comprehensive Assessment
Evaluate your organization’s current state to understand its strengths, weaknesses, and opportunities for growth.
Technology Audit: Assess existing IT infrastructure, applications, and tools. Identify outdated systems that need modernization or replacement.
Process Review: Map out current workflows and pinpoint inefficiencies or redundancies that can be addressed through digital solutions.
Cultural Readiness: Analyze your organization’s culture to determine the level of openness to change and innovation.
3. Develop a Strategic Plan
A well-thought-out strategic plan is the foundation of a successful transformation.
Prioritize Initiatives: Focus on initiatives with the highest potential for impact and align them with business objectives.
Create a Phased Approach: Break the transformation into manageable phases to minimize risks and disruptions.
Allocate Resources: Ensure sufficient budget, technology, and human resources are allocated for each phase.
4. Secure Leadership Buy-In
Strong leadership support is critical for driving the transformation.
Engage Key Stakeholders: Involve executives and department leaders early in the process to gain their support and insights.
Assign a Transformation Leader: Designate a dedicated leader or team to oversee the digital transformation journey and ensure alignment with organizational goals.
5. Focus on Technology Selection
Choosing the right technologies is crucial for enabling digital transformation.
Adopt Scalable Solutions: Invest in technologies that can grow with your business and adapt to future needs.
Leverage Emerging Technologies: Consider tools like AI, IoT, cloud computing, and advanced analytics to drive innovation.
Ensure Interoperability: Select systems that integrate seamlessly with existing tools and processes to avoid operational silos.
6. Build a Collaborative Culture
A culture that fosters collaboration and innovation is vital for digital transformation.
Encourage Cross-Functional Teams: Promote collaboration across departments to ensure cohesive implementation.
Promote a Growth Mindset: Empower employees to embrace change and continuously learn new skills.
Recognize Contributions: Celebrate successes and acknowledge efforts to maintain momentum.
7. Pilot and Scale Initiatives
Start small to test the effectiveness of your strategies and solutions.
Pilot Projects: Begin with pilot projects to refine processes, identify challenges, and measure outcomes.
Collect Feedback: Gather insights from stakeholders and users to improve implementation.
Scale Gradually: Once successful, scale the solutions organization-wide in a controlled manner.
8. Measure and Monitor Progress
Regularly evaluating progress is critical for ensuring that your digital transformation stays on track.
Define Key Performance Indicators (KPIs): Use KPIs to measure the success of your initiatives, such as increased efficiency, customer satisfaction, or revenue growth.
Monitor Continuously: Use dashboards and analytics tools to track performance in real time.
Adjust as Needed: Be prepared to pivot strategies or processes based on insights and evolving needs.
9. Prioritize Customer-Centric Transformation
Keep customers at the center of your digital transformation efforts.
Understand Customer Journeys: Map customer journeys to identify pain points and areas for improvement.
Deliver Personalized Experiences: Use analytics and AI to provide tailored solutions that meet customer expectations.
Enhance Engagement Channels: Optimize digital touchpoints like websites, mobile apps, and chatbots for seamless interactions.
10. Embrace Agility and Continuous Improvement
Digital transformation is a continuous journey, not a one-time project.
Adopt Agile Practices: Use agile methodologies to remain flexible and respond quickly to changes.
Stay Ahead of Trends: Regularly assess emerging technologies and industry developments.
Invest in Lifelong Learning: Foster an organizational culture of ongoing learning and development.
Strong leadership and governance are essential for setting the direction and maintaining alignment.
Create a Governance Framework: Define roles, responsibilities, and decision-making processes.
Empower Leaders: Train and support leaders to drive digital initiatives effectively.
2. Data-Driven Decision-Making
Leverage data to guide strategies and measure outcomes.
Implement Advanced Analytics: Use tools to analyze large datasets and derive actionable insights.
Prioritize Data Security: Protect sensitive information through robust cybersecurity measures.
3. Innovation and Experimentation
Encourage experimentation and innovation to unlock new opportunities.
Establish Innovation Labs: Create dedicated spaces for testing and developing new ideas.
Foster Collaboration with Startups: Partner with startups to bring fresh perspectives and solutions.
4. Employee Empowerment
Invest in your workforce to drive transformation from within.
Offer Training Programs: Provide ongoing training to upskill employees in digital technologies.
Encourage Autonomy: Give employees the tools and autonomy to innovate within their roles.
5. Ecosystem Partnerships
Build strategic partnerships to extend capabilities and resources.
Collaborate with Technology Vendors: Leverage expertise from vendors to accelerate implementation.
Engage with Industry Networks: Participate in industry forums to share knowledge and gain insights.
Conclusion
Digital transformation is a complex yet rewarding journey that requires a clear roadmap and well-crafted strategies. By defining a vision, assessing current capabilities, leveraging the right technologies, and fostering a culture of collaboration and innovation, enterprises can navigate this transformation successfully.
As a software development company and trusted Atlassian Solution Partner, MicroGenesis is here to guide your digital transformation journey. The roadmap outlined in this blog serves as a guide for enterprises to move forward with confidence, ensuring their place as leaders in the digital age. Are you ready to embark on your transformation? Let MicroGenesis help you lead the way.
The roadmap outlined in this blog serves as a guide for enterprises to move forward with confidence, ensuring their place as leaders in the digital age. Are you ready to embark on your transformation journey? Let’s take the first step together!
The transition from traditional software development to Application Lifecycle Management (ALM) represents a significant shift in managing software projects. ALM is an integrated, end-to-end approach to application development that covers all stages of the software lifecycle, from initial concept to retirement. By adopting ALM, organizations can enhance collaboration, streamline processes, and deliver high-quality software more efficiently. If you’re considering making this transition, this guide will help you navigate the process effectively.
Why Transition from Traditional Development to ALM?
Before diving into the how, it’s essential to understand the why. Traditional development approaches, often siloed and linear, can lead to miscommunication, delays, and inefficiencies. ALM, by contrast, offers:
Improved Collaboration: ALM tools provide a centralized platform where teams across departments can communicate seamlessly.
Enhanced Traceability: Every stage of development is documented and linked, making it easier to track changes, meet compliance requirements, and improve accountability.
Scalability and Flexibility: ALM accommodates modern methodologies like Agile and DevOps, enabling faster iterations and smoother integration of updates.
Better Quality Control: With integrated testing and quality assurance features, ALM minimizes bugs and ensures compliance with industry standards.
Challenges in Transitioning to ALM
Shifting from traditional development to ALM is not without challenges. Organizations may encounter:
Resistance to Change: Teams accustomed to existing workflows might resist adopting a new system.
Initial Learning Curve: ALM tools can be complex, requiring time and training for teams to adapt.
Integration with Existing Systems: Migrating data and processes from legacy systems to ALM tools can be cumbersome.
Cost and Resource Allocation: Implementing ALM tools may require upfront investments in software, training, and infrastructure.
Understanding these challenges is the first step toward overcoming them.
Steps to Transition from Traditional Development to ALM
1. Assess Your Current Development Process
Start by evaluating your existing development processes. Identify inefficiencies, bottlenecks, and areas where collaboration breaks down. Understanding your starting point will help you choose the right ALM tools and set realistic goals.
Key questions to consider:
Are your teams struggling with communication or documentation?
How do you track project progress and manage changes?
What tools and methodologies are currently in use?
2. Define Clear Goals for the Transition
Set measurable objectives to guide your transition. These goals could include:
Reducing development cycle times by a specific percentage.
Achieving greater traceability for compliance purposes.
Improving team collaboration and reducing siloed work.
Having clear goals will help you select the right tools and measure the success of your ALM implementation.
3. Select the Right ALM Tool
Choosing the right ALM tool is critical for a smooth transition. Look for tools that align with your organization’s needs, size, and workflows. Here are some popular options:
IBM Engineering Lifecycle Management (ELM): Best for managing complex systems with advanced traceability and compliance features.
PTC Codebeamer: Offers robust requirement management and risk management capabilities, ideal for regulated industries.
Siemens Polarion ALM: A unified solution with strong collaboration and traceability features.
Key factors to consider:
Integration Capabilities: Ensure the tool integrates seamlessly with your existing software.
Scalability: Choose a tool that can grow with your organization.
User Experience: Opt for a user-friendly interface to minimize the learning curve.
Cost: Ensure the tool fits within your budget while offering the required functionalities.
4. Develop a Transition Plan
Create a detailed roadmap for your transition, covering:
Timeline: Define phases such as planning, training, pilot testing, and full implementation.
Team Roles: Assign responsibilities for each stage of the transition.
Milestones: Set key deliverables and deadlines to track progress.
Example Phases:
Preparation Phase: Assess current workflows, select tools, and set goals.
Pilot Phase: Implement the ALM tool on a small-scale project to identify potential challenges.
Rollout Phase: Expand the implementation to other projects or departments.
Optimization Phase: Gather feedback and fine-tune processes.
5. Train Your Teams
Training is crucial for the successful adoption of ALM. Conduct workshops, webinars, and hands-on sessions to familiarize your teams with the new tools and processes. Focus on:
Navigating the ALM tool interface.
Using features like traceability, requirement management, and test management.
Understanding how ALM integrates with Agile or DevOps workflows.
Encourage a culture of learning and provide ongoing support to help teams adapt.
6. Migrate Data and Processes
Migrating from traditional systems to ALM requires careful planning. Start by:
Auditing existing data and processes to determine what needs to be migrated.
Cleaning and organizing data to ensure a smooth transition.
Using migration tools or APIs provided by your ALM vendor to transfer data.
It’s advisable to test the migration process in a controlled environment before scaling up.
7. Implement ALM in Phases
Avoid rushing the transition. Instead, implement ALM in manageable phases. Start with a pilot project to test the system and gather feedback. Use the insights gained to refine your approach before rolling out ALM across the organization.
8. Monitor and Optimize
After implementation, continuously monitor the performance of your ALM system. Track metrics like:
Reduction in development cycle times.
Number of bugs identified and resolved.
Improvement in team collaboration and communication.
Use this data to identify areas for improvement and make necessary adjustments.
Best Practices for a Successful Transition
Transitioning from traditional development to Application Lifecycle Management (ALM) can be complex, but adhering to best practices can ensure the process is smooth and successful. Here’s a deeper dive into five essential best practices that can help ensure the success of your ALM implementation.
1. Involve Stakeholders Early
Engaging stakeholders from the beginning is crucial for ensuring alignment and securing buy-in throughout the transition. This practice not only sets expectations but also fosters collaboration and trust among team members.
Why It’s Important:
Involving stakeholders early helps mitigate resistance to change. When key players—such as development teams, project managers, product owners, and senior leadership—are part of the process from day one, they are more likely to embrace the new system and support its implementation. Their early input also helps identify potential pain points, ensuring that the ALM system meets the organization’s specific needs.
How to Involve Stakeholders:
Hold Initial Workshops: Organize workshops or meetings to discuss the benefits of ALM, the reasons for transitioning, and how it aligns with business goals. Encourage open dialogue and listen to concerns.
Gather Input: Collect feedback on existing processes and pain points. Use this information to shape the ALM implementation plan.
Define Roles and Responsibilities: Clarify who is responsible for what during the transition. This prevents confusion later and ensures accountability.
Communicate Benefits: Clearly explain how ALM will benefit each stakeholder group. For example, developers may appreciate improved collaboration, while project managers may value better visibility into project progress.
2. Start Small
Transitioning to ALM can be overwhelming, so it’s best to start small with a pilot project. A pilot allows you to test the system in a controlled environment, minimizing risk and providing valuable insights into potential challenges.
Why It’s Important:
A phased approach reduces the risk of disrupting ongoing projects. A successful pilot project can build momentum, helping you gather data and feedback that will allow for a smoother rollout across the organization.
How to Start Small:
Select a Low-Risk Project: Choose a small, less complex project as your pilot to test the ALM system’s capabilities. This will allow you to assess the tool’s performance without putting critical projects at risk.
Set Clear Metrics: Define success metrics for the pilot phase, such as time-to-market, defect rates, or team collaboration improvements. This will help you evaluate the system’s effectiveness.
Get Feedback: After completing the pilot project, gather feedback from all involved teams. Identify what worked well and what didn’t, then use this information to tweak the process and tool configuration before scaling up.
Iterate and Improve: Based on feedback, adjust the ALM tool’s setup and workflows. Iterating during the pilot phase will provide a better understanding of what works for your team and what needs adjustment.
3. Leverage Vendor Support
ALM vendors often provide extensive resources to support their customers, including onboarding assistance, training, and technical support. Taking advantage of these resources can significantly ease the transition process.
Why It’s Important:
Many organizations underestimate the value of vendor support and try to implement ALM independently. However, relying on the vendor’s expertise can prevent common pitfalls and ensure that the ALM tool is correctly configured for your specific needs. Vendor support is a great resource for overcoming challenges, troubleshooting issues, and maximizing the tool’s potential.
How to Leverage Vendor Support:
Onboarding and Training: Most ALM vendors offer onboarding packages that include training for administrators and end-users. Make sure to take full advantage of these training programs to help your teams become proficient with the tool.
Documentation: ALM vendors typically provide comprehensive documentation. Be sure to review this documentation thoroughly during the implementation process to better understand the system’s features and configuration options.
Customer Support: Don’t hesitate to reach out to the vendor’s customer support team when challenges arise. These experts can help you solve technical issues quickly and guide you through any difficulties.
Consulting Services: Many vendors offer consulting services to help with system configuration and best practices. If your organization has specific requirements or faces unique challenges, working with a consultant can ensure a smooth implementation.
MicroGenesis, a trusted partner in ALM implementation. We offer tailored solutions, hands-on training, and expert guidance to help you succeed in your ALM journey.
4. Focus on Communication
Clear, consistent communication is key to maintaining momentum throughout the transition. Keeping all stakeholders informed helps manage expectations, addresses concerns proactively, and fosters a positive attitude toward the ALM implementation.
Without effective communication, misunderstandings and resistance to change can arise. Keeping everyone in the loop ensures that the transition remains a collaborative effort and that all team members understand the benefits and goals of the new system.
Leveraging ALM technologies further streamlines this process, providing tools for seamless collaboration, real-time updates, and transparent progress tracking. These technologies help teams stay connected and aligned, driving the success of your ALM implementation.
How to Focus on Communication:
Regular Updates: Schedule regular progress updates for stakeholders. These can be in the form of meetings, newsletters, or email updates, and should cover the status of the transition, milestones reached, and upcoming steps.
Open Channels for Feedback: Provide channels where team members can voice concerns, ask questions, and provide feedback. This could be through surveys, suggestion boxes, or regular feedback sessions.
Clarify Expectations: Ensure that expectations around the ALM system’s capabilities and timeline are clear. Misalignment on expectations can lead to frustration and delays.
Celebrate Wins: Share successes along the way, no matter how small. Highlight positive outcomes from the pilot project or initial rollout phases to demonstrate progress and keep morale high.
5. Iterate and Improve
ALM is not a one-time implementation—it’s a long-term investment that evolves as your organization’s needs and technologies change. Continuously iterating and improving the system will ensure that it remains effective and aligned with your goals.
Why It’s Important:
The first version of your ALM implementation is unlikely to be perfect. The needs of your team will evolve, and the tool may require adjustments to accommodate these changes. An ongoing improvement process ensures that the system adapts to your organization’s growth and changing requirements.
With expert ALM consulting, you can effectively navigate these changes, ensuring your system remains aligned with your goals. Consultants provide tailored strategies, insights, and support to optimize your ALM tools and processes for long-term success.
How to Iterate and Improve:
Post-Implementation Review: After completing each phase or milestone, conduct a review to assess what worked and what didn’t. Collect feedback from all relevant stakeholders to pinpoint areas for improvement.
Fine-Tune Processes: Based on feedback, tweak your workflows, tool configurations, or even team roles to optimize your ALM system. For example, you may need to add more automation, improve integration with other tools, or refine reporting processes.
Monitor Key Metrics: Continuously monitor metrics such as development cycle times, defect rates, and team collaboration. If there are areas where you’re not seeing improvements, dig deeper to identify root causes and adjust accordingly.
Stay Current with ALM Tool Updates: ALM tools often release new features and updates. Stay informed about these changes and determine whether they can benefit your organization. Regular updates help keep your system current and ensure you are leveraging the full potential of the tool.
Conclusion
Transitioning from traditional development to ALM is a transformative journey that can significantly improve your software development process. While the shift requires careful planning and effort, the benefits—improved collaboration, traceability, and efficiency—make it well worth the investment.
If you’re ready to take the next step, consider reaching out to MicroGenesis, a trusted ALM solutions and software development company. We offer tailored solutions, hands-on training, and expert guidance to help you succeed in your ALM journey. Contact us today for a consultation or demo!
In a highly competitive and rapidly evolving digital landscape, businesses face immense pressure to deliver innovative solutions faster and more efficiently. The traditional software development lifecycle (SDLC) often falls short in meeting these demands due to bottlenecks, siloed teams, and inefficiencies in collaboration and deployment. Enter DevOps—a game-changing approach that bridges the gap between development and operations, fostering a culture of shared responsibility, automation, and continuous improvement.
This blog delves into the roadmap for DevOps implementation, its business benefits, and the key metrics to measure its success. By the end, you’ll understand how this methodology can be a transformative asset for your organization.
What is DevOps?
DevOps is not just a set of tools; it’s a cultural and operational philosophy that integrates people, processes, and technologies. It aims to eliminate silos between development (Dev) and operations (Ops) teams, enabling faster, more reliable software delivery.
At its core, DevOps emphasizes:
Collaboration: Breaking down barriers between teams for seamless interaction.
Automation: Streamlining repetitive tasks to improve efficiency.
Continuous Improvement: Leveraging feedback loops to enhance workflows and deliverables.
Monitoring and Feedback: Ensuring real-time insights for ongoing optimization.
Business Benefits of DevOps Implementation
Adopting DevOps provides tangible advantages across various dimensions of your software delivery lifecycle:
1. Accelerated Time-to-Market
DevOps practices like Continuous Integration (CI) and Continuous Deployment (CD) ensure that software updates and new features are delivered quickly without compromising quality. As a leading DevOps service provider, we enable faster releases that empower businesses to respond promptly to market demands and gain a competitive edge.
2. Enhanced Collaboration and Communication
The collaborative nature of DevOps fosters a culture of shared responsibility, aligning goals between teams. This synergy leads to smoother workflows, fewer misunderstandings, and more innovative problem-solving.
3. Increased Efficiency through Automation
DevOps emphasizes automation across the SDLC, from code integration to testing and deployment. This reduces human intervention, minimizes errors, and speeds up delivery cycles, allowing teams to focus on high-value tasks.
4. Improved Software Quality
By integrating automated testing and real-time feedback, DevOps helps identify and resolve issues earlier in the development process. This results in more robust and reliable software, enhancing user satisfaction.
5. Scalability and Flexibility
With practices like Infrastructure as Code (IaC) and containerization, DevOps enables organizations to scale applications and infrastructure dynamically. This flexibility is crucial for handling growth and adapting to evolving business needs.
6. Continuous Feedback and Learning
DevOps thrives on iterative feedback loops, ensuring that teams are constantly improving processes and outcomes. This approach creates a culture of learning, innovation, and adaptability.
DevOps Implementation Roadmap
Implementing DevOps is a structured journey that involves cultural, technical, and procedural transformations. Here’s a step-by-step roadmap to guide your organization through the process:
Step 1: Assess the Current State
Begin by evaluating your existing development and operational workflows. Identify:
Bottlenecks in processes
Pain points in collaboration
Tools and technologies currently in use
Opportunities for automation
Define a clear vision for DevOps adoption, outlining measurable goals and objectives.
Step 2: Build a Cross-Functional Team
Assemble a team of stakeholders from development, operations, QA, and other relevant departments. Ensure they have the skills and commitment to drive DevOps adoption across the organization.
Step 3: Develop a Comprehensive Strategy
Craft a roadmap that aligns DevOps goals with business objectives. Key components of this strategy should include:
Identifying areas for improvement
Selecting the right tools for CI/CD, monitoring, and automation
Establishing success metrics and KPIs
Training and upskilling team members
Step 4: Containerize Applications
Adopt containerization tools like Docker or Kubernetes to ensure consistent application environments. Containers simplify deployment processes, reduce dependency issues, and streamline operations management.
Step 5: Automate CI/CD Pipelines
Integrate CI/CD tools such as Jenkins, Bamboo, or GitLabCI/CD to automate code building, testing, and deployment. This step accelerates delivery cycles and reduces manual errors.
Step 6: Implement Test Automation
Prioritize test automation to ensure code quality and minimize post-release issues. Identify high-value tests for automation, such as regression and performance testing, and collaborate closely with QA teams.
Step 7: Monitor and Optimize
Use monitoring tools like Prometheus, Nagios, or Datadog to track application performance and identify issues in real-time. Establish a feedback loop for continuous improvement and optimization of processes.
Key Metrics for Measuring DevOps Success
The success of DevOps initiatives is best evaluated through quantifiable metrics. Here are some key performance indicators (KPIs) to consider:
1. Deployment Frequency
Measures how often new features or updates are deployed. A higher frequency indicates improved agility and efficiency.
2. Lead Time for Changes
Tracks the time taken for a change to move from development to deployment. Shorter lead times reflect a streamlined development process.
3. Change Failure Rate
Monitors the percentage of deployments that result in failures or require rollbacks. A low failure rate indicates higher reliability and stability.
4. Mean Time to Recover (MTTR)
Measures the time taken to recover from a failure or incident. A shorter MTTR minimizes downtime and ensures business continuity.
5. Cycle Time
Tracks the duration of completing development tasks from start to finish. Reduced cycle times indicate efficient workflows.
6. Customer Satisfaction
While not a technical metric, customer satisfaction surveys and Net Promoter Scores (NPS) provide valuable insights into the impact of DevOps on user experience.
Challenges in DevOps Implementation
While the benefits are significant, implementing DevOps is not without challenges:
Cultural Resistance: Teams may resist changes in workflows and responsibilities.
Skill Gaps: Lack of expertise in DevOps tools and practices can hinder adoption.
Tool Overload: Choosing the wrong tools or implementing too many can create inefficiencies.
Initial Costs: Investments in training, tools, and infrastructure may seem high initially but deliver long-term returns.
Overcoming these challenges requires a strategic approach, strong leadership, and a commitment to fostering a DevOps culture.
Why Choose MicroGenesis as Your DevOps Partner?
At [Your Company Name], we specialize in helping organizations achieve DevOps excellence. Our expertise includes:
Custom DevOps strategies tailored to your business needs
Comprehensive CI/CD pipeline implementation
Proficiency in leading tools like Jenkins, Docker, and Kubernetes
Ongoing support, training, and process optimization
Our proven track record ensures that your organization can harness the full potential of DevOps to achieve faster, higher-quality software delivery.
Final Thoughts
DevOps is more than a buzzword; it’s a transformative approach that aligns your teams, processes, and technologies for unmatched efficiency and innovation. Partnering with experienced DevOps solution providers and a leading digital transformation company helps you follow a structured roadmap, embrace automation, and track success through key metrics to achieve higher productivity and customer satisfaction.
Whether you’re just beginning your DevOps journey or looking to optimize existing practices, the right guidance and strategy can make all the difference.
Ready to accelerate your software delivery lifecycle? Partner with MicroGenesis TechSoft and start your DevOps transformation today!